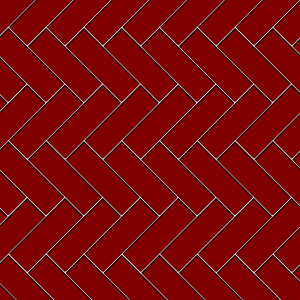
Herringbone patterned art is showing up all over Pinterest. Of course I had to try my hand at it for the new house. The results were pretty good for a first try.
Here is the tutorial for what is really a simple, but time consuming, art project.
I bought this frame with a covered bridge print in it from my favorite thrift store for $2.00. The print was on super heavy cardboard that was in good shape. It became the base for the art project. The frame just needed to be painted when the art project was done. It was a nice size for a first attempt. The cardboard print was 18″X24″ with the frame adding four inches to each side.
I purchased three bottles of Plaid brand paints in the colors that coordinate with the room. I literally poured the paint in strips on the cardboard print then got a big brush and started mixing the edges together.
Here are the results:
While the paint was drying I rolled out two long sections of Frog painter’s tape. I cut one of them into 5 inch sections and the other into 3 inch sections because I wanted there to be a little more interest in the pattern. I modified the pattern you see below by making the alternating diagonal two inches shorter.
Once it was totally dry I started taping down wide green tape. I may or may not have gotten the blow dryer out to speed the process because I am impatient 🙂 The picture of this part did not come out at all. GRRR. Because I was impatient to get started painting over the tape, I did not check the picture before moving on to the next step. It was way too dark to show. I frustrate myself when I mess up like this. Here is my inspiration:

I put down a section of 5″ tape at an angle on the cardboard canvas then put a 3″ section at the end of the 5″ piece to match the width, leaving a sort of grout line sized space between each piece. I went to Pinterest for Herringbone examples at this point to make sure that I was at least on track. Once I got a whole row done across the cardboard canvas, completing the taping went quickly because I just had to keep the spacing the same and follow the pattern.
Once the whole painting was covered, I painted white plaid paint over the grout-ish lines that I created by leaving space between the tape. As soon as the paint covered everything, I gently started peeling tape up.
I painted the white paint on fairly light so that it would minimize the drippy edges.
A coat of white spray paint on the frame and I was done. Easy. Ta Dah!
I love it above the bed. It really helps to tie the room together.
Here are some of the blogs that I visited for inspiration:
http://whiletheysnooze.blogspot.de/2013/01/diy-herringbone-metallic-artwork-easy.html
http://www.craftaspell.com/2013/06/diy-herringbone-canvas-art.html


Leave a Reply