The bathroom renovation is under way. Board and batten walls are installed, my cool shelving unit is done, the chandelier is being updated, and, best of all, the bathroom vanity is almost ready for installation.

Are you one of those people who can see what you want something to look like finished? I am and that is not always a a good thing because nothing will satisfy you except that “look”. This time the look was a Restoration Hardware weathered finish vanity. I wanted this look:

20140708-071114-25874634.jpg

Restoration hardware look

Just for grins, I priced one in the finish I wanted and the size it would take for our bathroom. The vanity, with a top but no mirrors would have been $3750.00. It would have been over $4000.00 for the whole package. In other words… out of our budget.

Sooo, I started looking for a dresser to re-purpose for our bathroom.  It was tricky to find one the right size.  When I finally found to the dresser that would work, it was $200.00.  That is a lot more money than I usually spend but finding an exactly 72 inch dresser that was solid wood or at least wood veneer over plywood was tough. I would love to tell you I got it for $30.00.

20140706-200126-72086336.jpg

20140706-200126-72086530.jpg

20140706-200126-72086437.jpg

I also started researching methods to get the look of Restoration Hardware.  I wanted it to look like a piece of furniture that was old and has a history with a weathered finish. A quick trip to Pinterest turned up some ideas for me to think about.

I liked the idea of layering finishes here at Deannario.com

Weathered Dining Table

But…

I wanted it to look like it might have been painted at one time and the paint had worn off over time.  I found AKA Design that talked about using Pickling Stain.  I liked the look but without the extreme sanding.

Using Pickling Stain

I used elements of both to get the look I was seeking.

I used the following materials:

minwax weathered oak

Weathered oak

minwax pickling stain

White Wash Pickling

minwax jacobean

Jacobean Stain

Lots of cotton rags- I bought them at Home Depot because I was too lazy to go hunting for cotton thirsts.

Cheap paint brushes- the dollar each cheapo brushes.

Sand paper-100 grit

Citristrip- it took a whole container

Marine Grade Urethane

marine varnish

First strip the dresser.   I used Citristrip and a hard plastic scraper.  And a ton of paper towels. It took a lot of patience.  I remembered why I don’t strip dressers.  Particularly big ones with a lot of drawers, moulding, and doors.

After I stripped it, I had to wash everything down to remove the residue then I sanded it, but not all the way to raw wood color.


20140706-195939-71979930.jpg

The first stain I added was Minwax Weathered Oak.  The color was not as vivid as I thought it would be and I worried. Rub it in, then remove the excess. Once the stain was totally dry I applied pickling white wash and wiped it off immediately.  If I could have had help at this point it would have been nice because the pickling white wash dried really fast.  It dried so fast on the doors that I ended up having to have it stripped again and start over.  The lesson here; don’t use this stuff if it is too warm. This worked best in the morning. Thanks Hubby.  I just couldn’t strip those doors a second time.

20140706-200822-72502744.jpg

Here it is right out of the can.  It is super thick and sort of goopy.

20140706-200837-72517131.jpg

This is what it looks like wiped down.

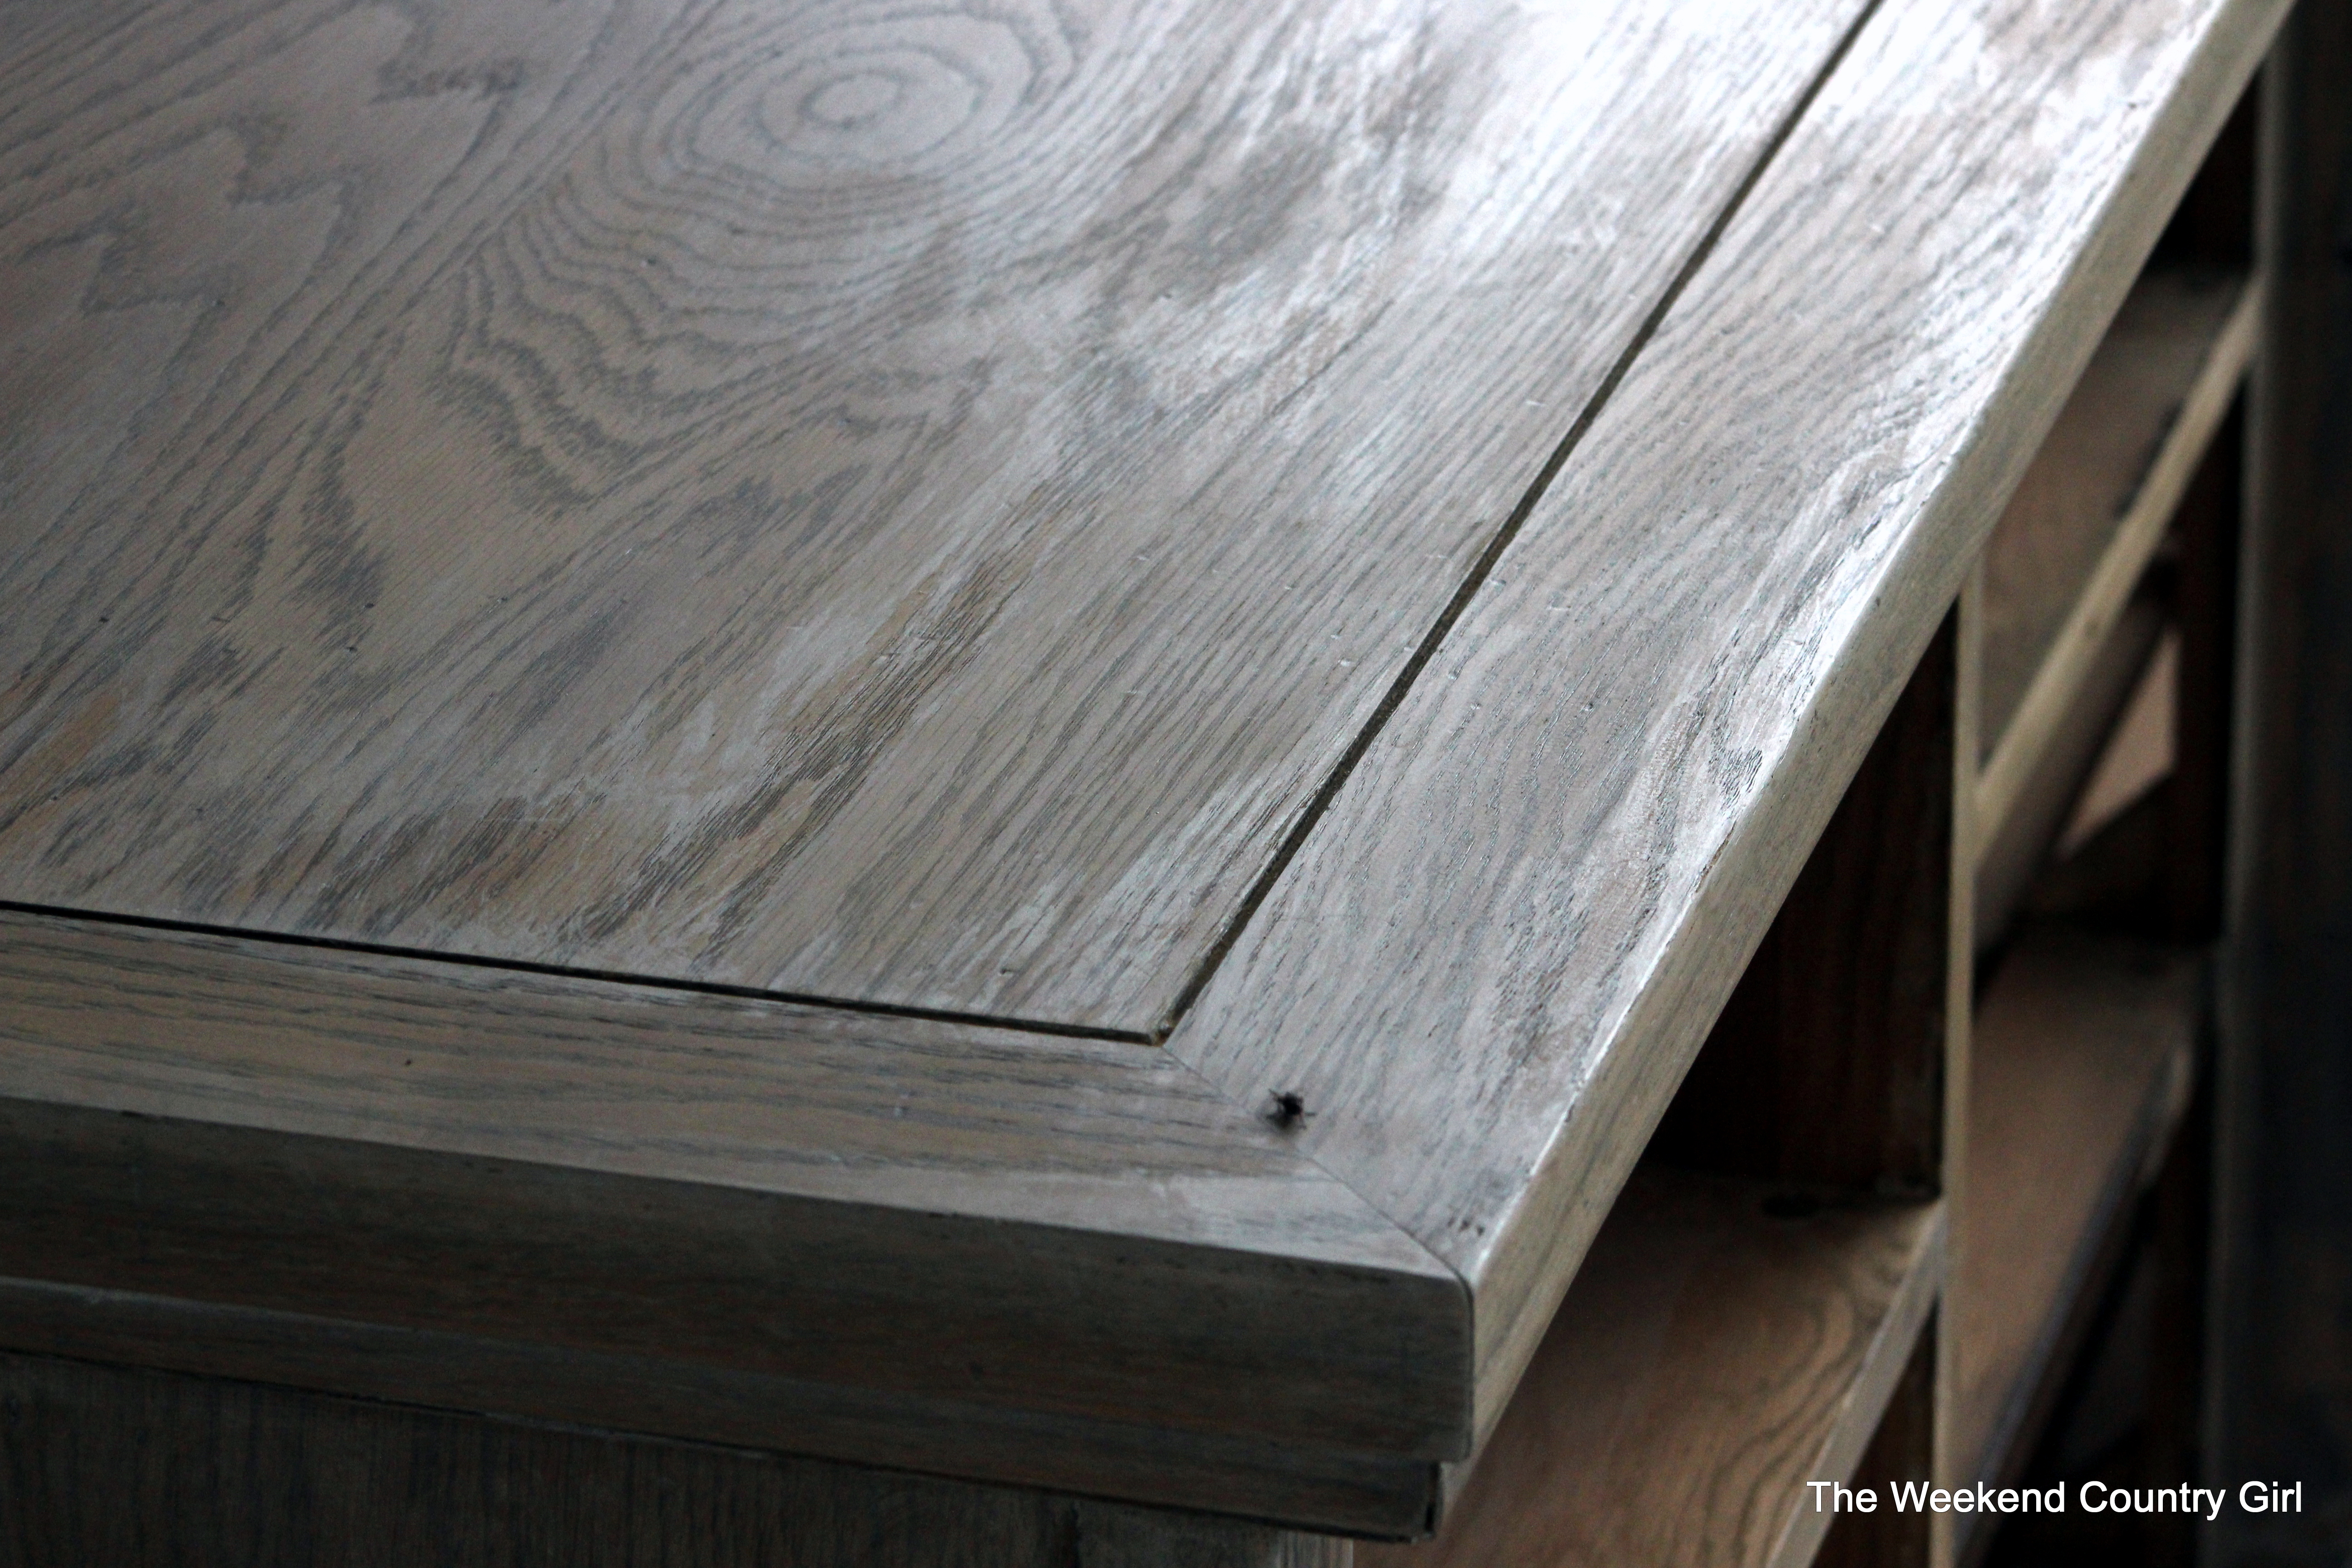
I lightly sanded once the Pickling was dry but not all the way back to raw wood and not evenly. The final coat of the layering stain was Minwax Jacobean.  I was so worried that it was going to be too dark but it was perfect.  The color over the pickling white wash produced a color just like you would see at Restoration Hardware.


1-IMG_7321 weathered finish Restoration Hardware Look using pickling and stain for Restoration Hardware finish Restoration Hardware cabinet doors Restoration Hardware Finish

I am really hard on myself and always see every mistake but I was really thrilled with how this turned out.

20140706-200821-72501205.jpg

20140706-200835-72515412.jpg

I stained the sides of the drawer with Jacobean stain to add contrast.

20140706-201017-72617913.jpg

The hardware got a coat of Rustoleum Oil Rubbed Bronze.

20140707-174414-63854725.jpg

20140707-174415-63855209.jpg

The final coat for this vanity is marine varnish in satin finish. It will give the piece the waterproofing that it is going to need in the bathroom. I decided to keep the wood top instead of adding a stone top to the dresser. That means a lot of coats of varnish but if they use it on boats it ought to hold up in a bathroom.

Here are what the sinks we are going to install look like. They were exactly what I was thinking of when I started this process and are going to look great.

20140707-173006-63006997.jpg

Lowe’s Link
An oil rubbed bronze faucet and we will finish it off!

I decided to post this even though we are not finished because I have had a lot of requests to talk about the process. Honestly, anyone can achieve this finish. I hope it inspires you to give it a try.

Addition: I used the same method to redo the body and one drawer of this funky dresser. I would love to hear your thoughts on my work.

Blessings,

Karen

30 responses to “Getting a Restoration Hardware Weathered Finish”

  1. Outstanding!!!!! Love this!!!!

  2. Rhonda McSweeney Avatar
    Rhonda McSweeney

    It looks amazing! You’ve found the perfect combination for the look. I really love the side of the drawers being stained for the contrast. Thank you for posting the steps with pictures of product used and the pieces step by step. Great tutorial!

    1. Thank you for the kind words. It has been a fun projects…even if it has been slow moving.

  3. It looks great. I need to redo the bath in my mom’s home and, while it is daunting because there are so many cabinets, I think this will be the perfect thing to tie the mismatched cabinets together. Can’t wait to find a dresser for the sink cabinet.

    1. Good luck. There are tons of dressers out there.

  4. […] about the bathroom is the dresser we bought that I repurposed into a bathroom vanity.  I love the Restoration Hardware look of the refinished wood, I like the wood top- that we have covered with a million coats of […]

  5. Thank you all for checking out my blog. I am a teeny tiny hobby blog so it is fun to have people look at our work.

  6. Hi, I noticed that in the list of products you used it says, “Weather Oak” stain but in the photo the can of stain says, “Classic Grey”. Can you confirm which one it was for the base coat? Thanks so much!

    1. Janel,
      My apologies. I definitely use Minwax Weathered Oak. I will get this corrected. Good luck with your project.

      1. Thanks for getting back to me!

  7. Ive been searching all over for a re-done piece simlar to the one I am working on.. this is the same EXACT dresser i just got from a thrift store! I need some advice! i am turning mine into an entertainment console, but i have already started the process and have sanded parts of it all the way down. I am really liking the way its turning out, but im wondering if i can follow your technique still?

    1. You can follow my steps. I tried it recently on a sanded piece. You might want to try it out on a test piece of wood first to get the look you are going for. Good luck, and share your project with me when you are done!

  8. Wow, this style is absolute perfection. I always thought that it was really difficult to create this type of feel with furniture. My husband and I recently came to a lot of furniture from my grandmother. We have been thinking about taking it to a furniture restoration place here in New York. I will definitely ask them to incorporate this type of style!

    1. Thank you so much. It is not a hard process.

  9. Do you mind posting a picture of the whole completed vanity. Thanks

    1. Here is a blog post about the vanity. There are finished pictures included. I hope you enjoy. This post was a follow up because so many asked me how I got the finish. When I wrote it, it was to explain something that had been done. I may need to add more photos now. Thanks for writing in.

      http://theweekendcountrygirl.com/2014/08/20/turning-a-dresser-into-a-bathroom-vanity/

  10. I used this tutorial to finish a console table that my step-dad built for me. It was exactly what I wanted! Link to photo: https://www.instagram.com/p/BGibTugooZ4/

    1. Great job! That looks exactly like RH

  11. What kind of wood was the dresser? I have a cherry dresser that I’m trying to get the same effect but wasn’t sure if it’d turn out.

    1. The dresser was oak so o can’t promise it will be the same. I would test an area.

  12. […] figured out this finish through trial and error and have used it several times like here on the bathroom vanity in our suburban […]

  13. Hey…I actually like this piece BETTER than the restoration hardware one!! way to go…I’m going to try this process on a coffee table!!

    1. It is so easy! Go for it.

  14. Shannon Ellis Avatar
    Shannon Ellis

    My furniture is already a light oak. Do you think I need to strip it or can I go ahead and start with the sanding (lightly) then the pickling stain?

    1. Yes! I have done that and it works as long as the color isn’t too yellow or red toned.

  15. Looks nice. I tried on a piece with gray stain but the pickeling really helped with yours.

  16. when you put the last step on the jacobean stain ,
    did you brush it on or rub on with a rag and did you wipe it off afterwards this looks so good🤔

    1. I actually paint it on with a brush then wipe it off with a cotton rag. It is super easy.

  17. Gorgeous! May I have the name of the marine varnish you used ?

Leave a Reply

Trending

Discover more from The Weekend Country Girl

Subscribe now to keep reading and get access to the full archive.

Continue reading