Behr Paint with Primer, Building a Home, Coldspring, Painted Furniture, painting, Repurposed Furniture, Rubbish Rescue, vintage style

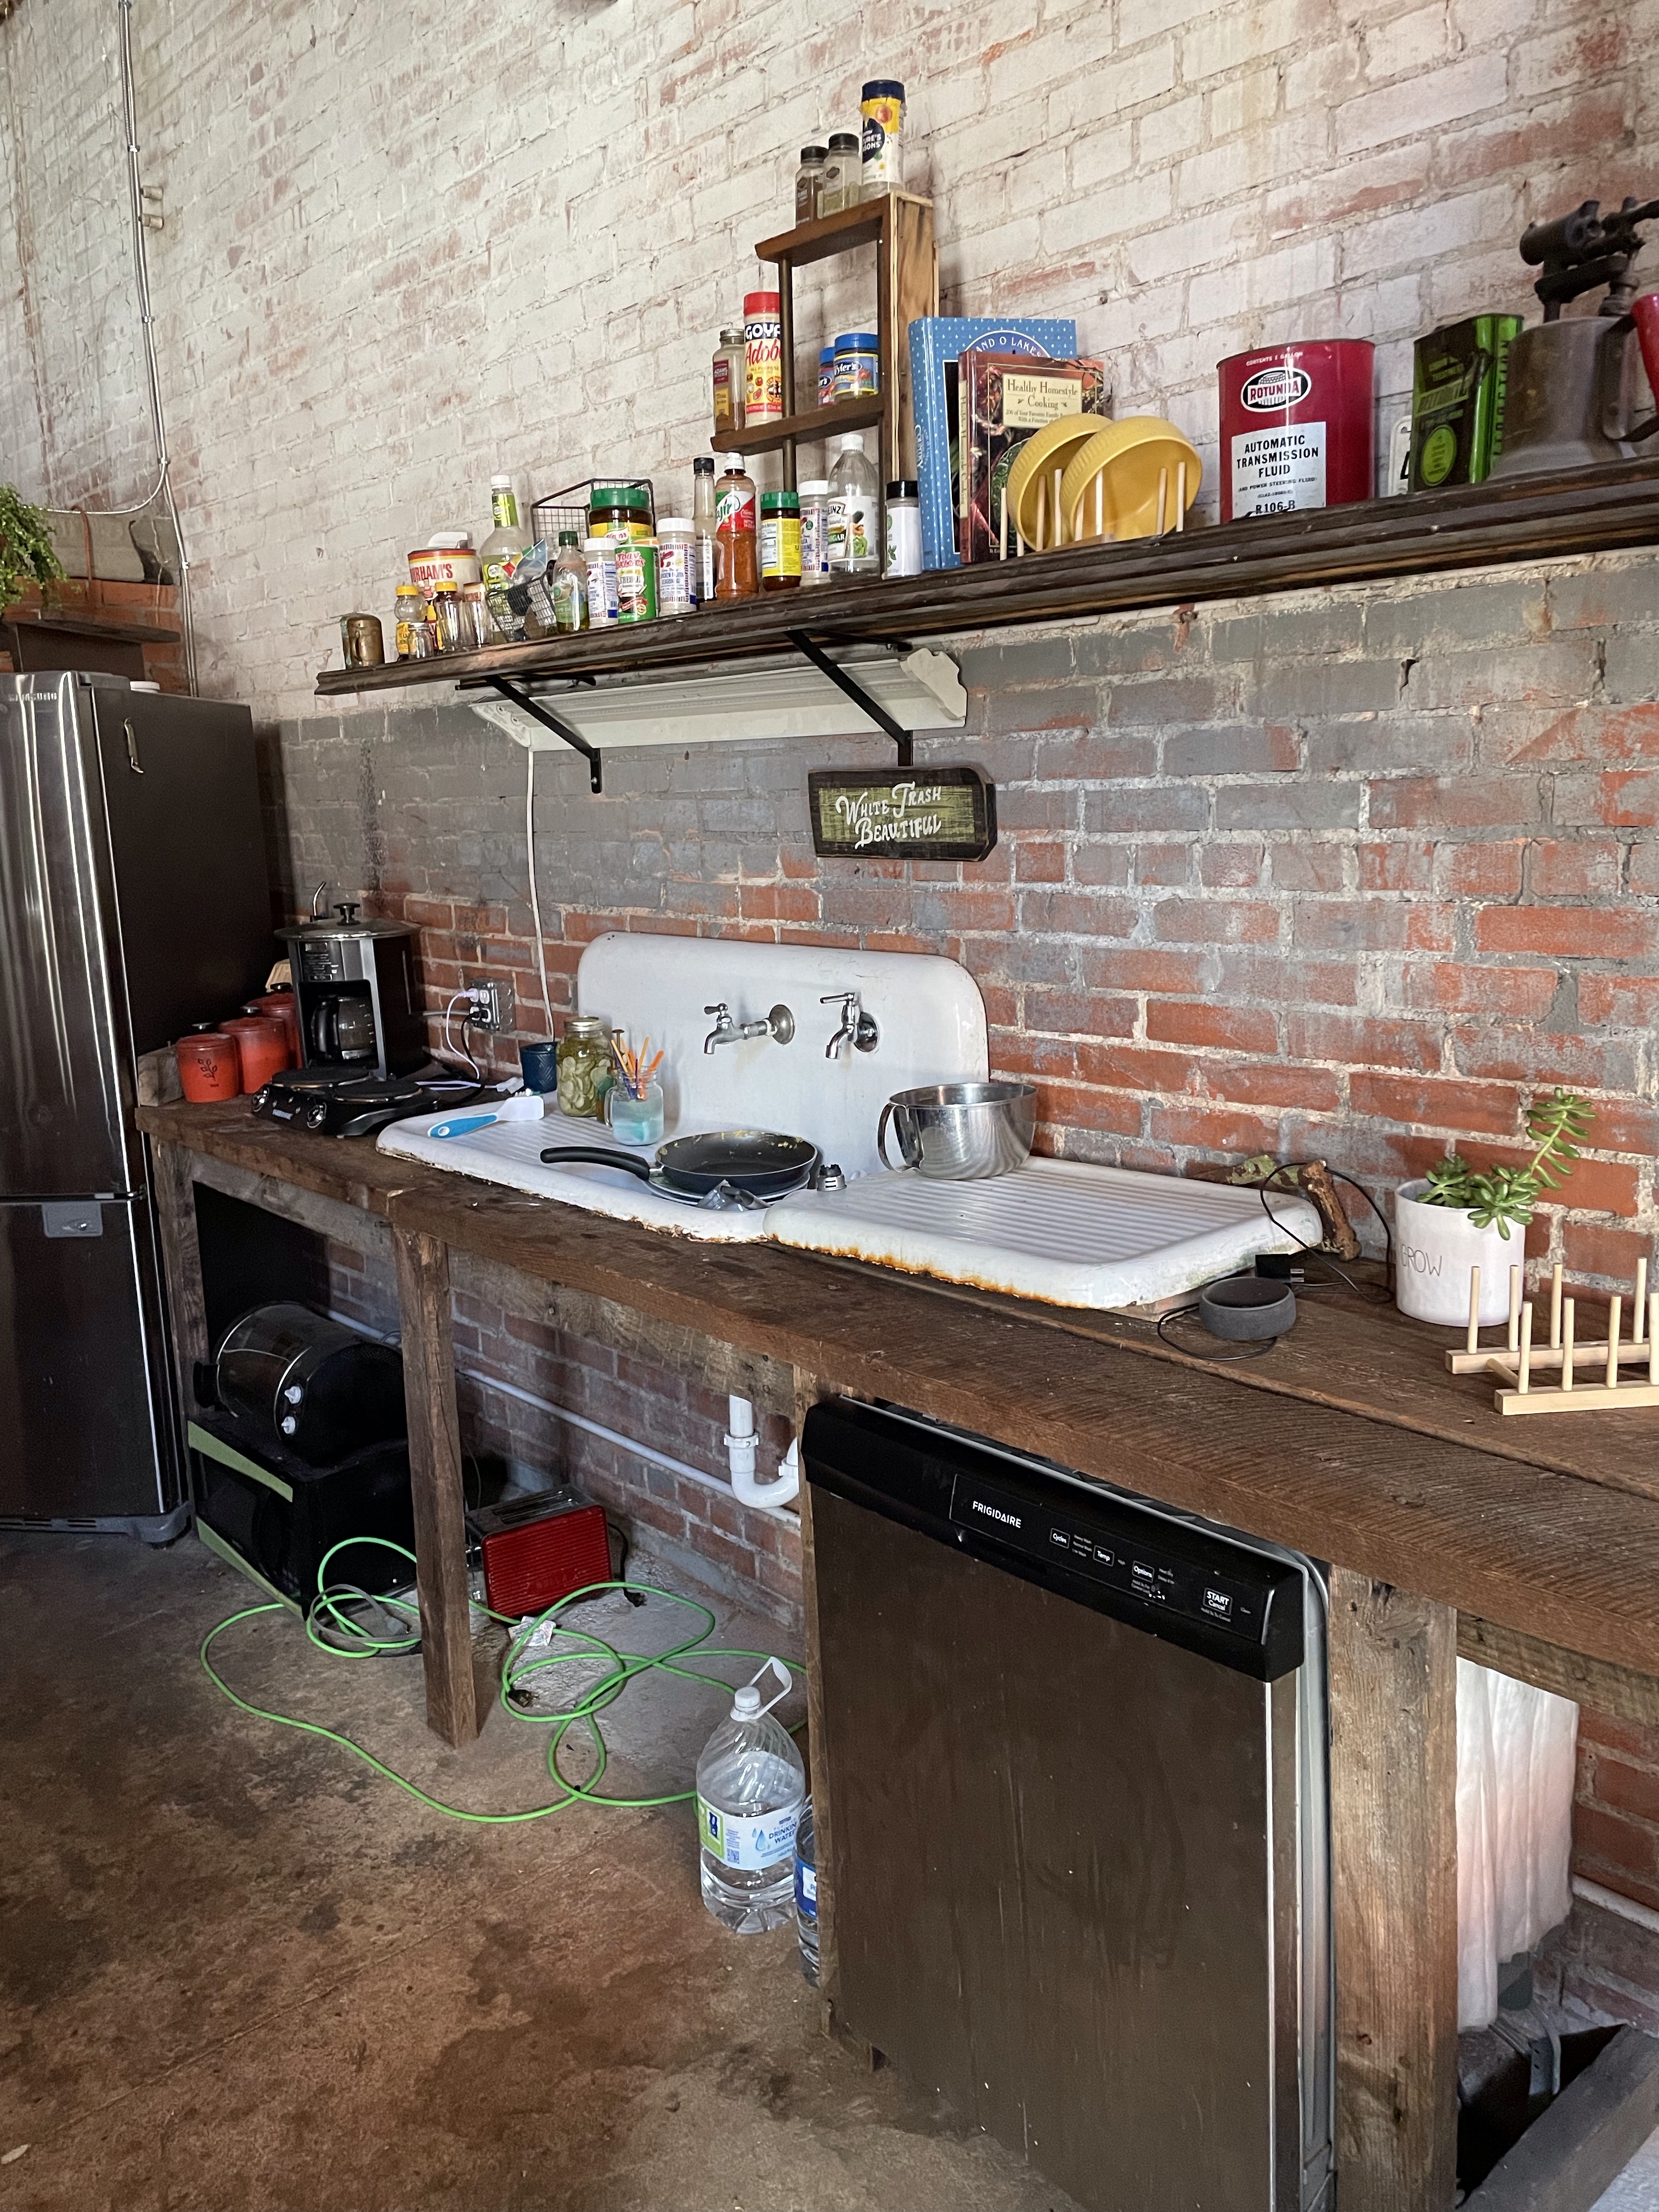
Covering the Breaker Box in the Guest House

I love our guest house. It is more of retreat for me than a guest house actually. I paint, read, and nap out there.

It is my favorite spot on our property.

I am generally happy with how the place looks and is decorated, and I love the exterior, the windows, the wood floors and the bathroom but there has been a spot that has bugged me since the sheetrock went up.

The breaker box stuck out from the wall and even worse it is slightly crooked. I made a really bad choice with the contractor I selected. While we were out of town he allowed an inexperienced crew to sheetrock and it was terrible. The contractor did not stand by his work and abandoned the job shortly after. Fixing the breaker box would require ripping out sheetrock and framing work and I’m just not willing to go through that yet.

For a year I’ve lived with the crooked ugly box but I kept looking at some cabinet doors in the shop and an idea formed.

I disliked the breaker box so much that this is the only photo I could find of it!

This past March we went to pick up furniture and I picked up some cabinet doors and hardware. The cabinet doors were literally about to go on a burn pile. The pile was already burning and they were stacked up ready to take over once we left. I took them home with me when they were offered.

My husband built a box to hang the cabinet doors from out of 1X 4 pine. He clamped, glued, and screwed it together then let it dry. After it was dry he attached metal corner reinforcement to the box.

I knew I wanted something that didn’t protrude very far into the room so a shallow ( 4 inch deep) cabinet that covered the box and had easy access to the breaker box was the answer.

He attached the box to the wall with angle brackets into the studs then used the hinges that were already

The cabinet door is plumb (vertically level) just to give you an indication of how crooked the breaker box is.

Once to the doors were installed I painted the box and interior the color of the walls, Behr Helium.

I painted the doors the color of the v groove wall, Behr Ocean Boulevard. I feel like at this point I need to remind some people that A: I don’t paint over all wood. There is a ton of stained wood in the guest house. B: These doors are not antique even though they are solid wood. C: The doors were headed for a burn pile. Surely painting them is better than destroying them.

Ocean Boulevard on the wall behind the kitchen cabinets.

The door color was a little more intense than I wanted so I whitewashed and distressed the carving and detail on the doors. I am pretty pleased with how it turned out.

I am so happy to not have to look at the breaker box anymore!

I hope you have a great day!

Thanks for following us as we continue to work on our home.

Coldspring, Fun with friends, recycled furniture, Repurposed Furniture, ship lap

An Unexpected Visit

A funny thing happened on the way to the antique store this week.

The Social Planner, her sweet husband, Mr. Math, and I took a quick trip to a town I am falling in love with, Crockett, Texas. The town has some of the most beautiful old homes, a walkable downtown, and great food. It also has some really nice shops, resale, and antique stores.

This was The Social Planner and my second visit in less than a week. I found something that I just had to go back for on our first trip and luckily it was still there when we wrangled the guys into going back and they were troopers. We found several more shops on Goliad Street that we hadn’t visited before and met the nicest people.

The unexpected visit on the trip started when we, four grandparents who looked like exactly what we are, walked out of an antique store to the roar of a chopper pulling out of the garage next door. It was beautiful. It looked like something off television and the rider could have been an actor from easy rider. As we stared at the chopper pulling away a sweet young lady walked out of the garage to tell us hello. She was so welcoming and pleasant we stayed to visit.

Robin and Ronnie own Filthy Gringos. They make custom parts, build custom bikes, laser cut designs in metal, and ship a lot of it to other places. They moved from Houston to this small town because they wanted a simpler life and lower cost of doing business and it didn’t really matter where they are located. I learned they bought the building two years ago that was literally falling down, rebuilt it, and got permission from the city to convert part of the building into living space. We visited long enough that we got to meet their son Oden and see the awesome home they are in the process of creating/finishing. As soon as I saw the space I knew they were my people. Reuse, redesign, reimagine. The building was originally a cotton gin and has 16 inch thick walls, at one time had a huge skylight, and still has the vault for keeping records and money when cotton was bought and sold. They retained as much of the original items as they could.

Welcome to their space: I am so sad I didn’t take more pictures. The entrance to the home is a wide barn door that was original to the building but I was so shocked she invited us in I didn’t get a picture. It takes a lot of courage to let a stranger come into your home with no warning and allow them to take pictures of the home.

The main living space.
There is so much cool and unique stuff there,
The kitchen area. That vintage sink is cool.
You can see some of the reused materials here.
There are no walls in the interior space. Rooms are divided with these repurposed bookcases from the high school which was torn down.

The bathroom was my very favorite. They literally turned the vault into the bathroom.

The safe door.
The yellow cabinet is so cool.
Ronnie did come back on the chopper while we were inside the home part of the shop and had a good visit with the guys.

Never pass up the opportunity to meet new folks. We got to see a super cool space and learn new things. if you get the chance, visit Crockett, Texas.

Blessings,

Karen

Behr Paint with Primer, Building a Home, Coldspring, guest house, Repurposed Furniture

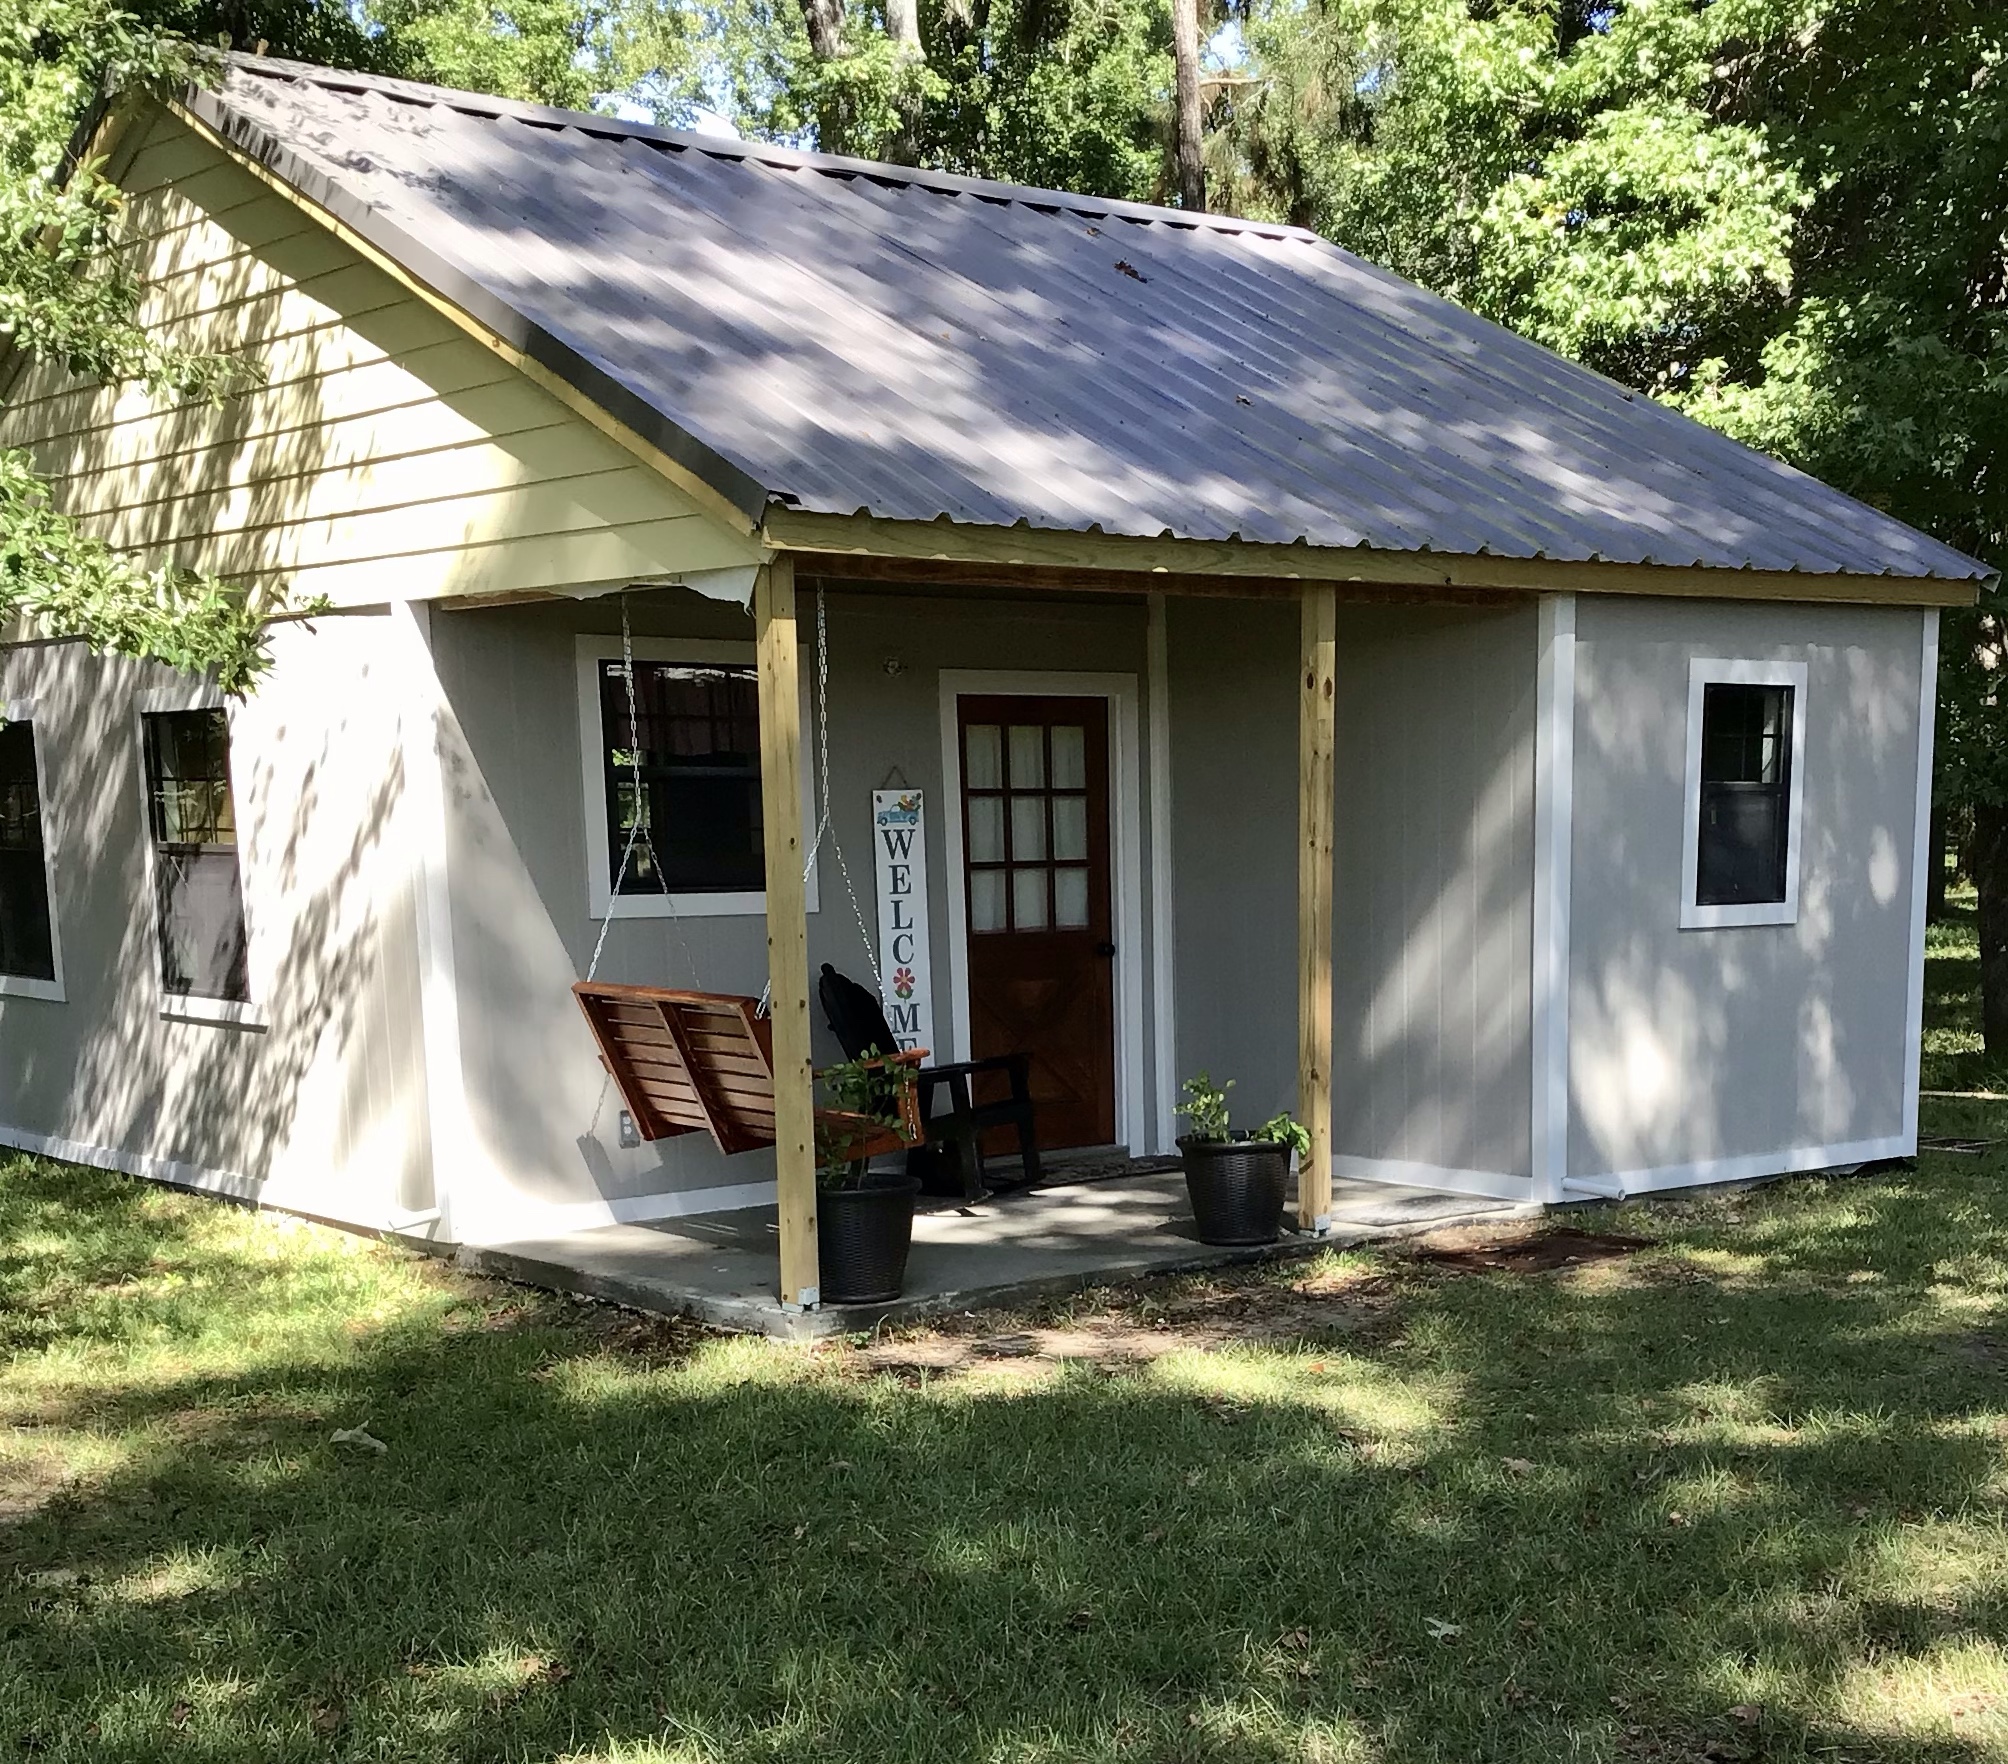
The Guest House Porch

We spend a lot of time outside and porches are important to us. It shouldn’t be a surprise that the guest house has a little porch to welcome guests. The original building had a sort of porch but we took out the original slab and reconfigured the space. We now have an eight foot by twelve foot porch that is blocked by the north wind and rain we get in the winter but open to the prevailing southern summer breezes. It has a great view of the garden and down the road will have a nice front view. I have plans.

The porch ceiling isn’t finished yet ( or the top section of the house caulk and paint) but we are still moving forward.

Our future plans for the porch are to put in a shiplap ceiling painted haint blue, cover the front posts and beams with cedar, and possibly do something with the concrete slab.

I am excited to say that the house got a coat of Behr True Taupewood, it is a gray with brown undertones. The trim is almost done and is painted Behr Dove. It is going to look beautiful with the door, swing, and cedar trim.

Speaking of swing, my goodness this four foot cypress beauty is a show stopper. A friend makes swings and other items in his shop. I love that it was custom made for us, It is stained a cedar stain and has three coats of Spar Urethane so that it can hold up to the weather.

We also have an Adirondack style rocking chair that was literally salvaged from the trash and rebuilt by Mr. Math. It got a good coat of black spray paint and has a place on the porch.

On top of the finishing up we need to do, I also want to make a barn quilt for the blank wall by the door. The view from the swing is just a blank wall and this house is all about quilts.

I found this pattern https://newlywoodwards.com/how-to-make-a-diy-barn-quilt/
I like how simple it is.

The Behr App has a project tab where you can save colors and look at how they go together.

All of the paint is in my shop right now so the 36 x 36 inch plywood is all that is needed.

We are making great progress now and it feels like we are getting somewhere finally. I am so thankful for all the work my husband has put in to get here.

Thanks for following along on our journey.

Blessings,

Karen

Coldspring, Country living, Dining Table, Gates, Ranch House Overhaul, Repurposed Furniture

Weekend Update

Right now we are working full-out every weekend and I am not doing a great job of taking pictures so I thought I would give you all a quick look at our progress.  I did such a bad time last week that I never got the post done.  Sorry.  This post is a mix of both weeks’ work.
When I left the house a week ago, this was all we had done.  The carpet was up and my buddy was sweeping the grit off the floor after the epic carpet removal.  Note to self; next time I think it is a good idea to remove one whole room of carpet in a solid piece, rethink that idea.  It was work.
This week/ weekend we got the following done:


  • The walls in the main room and laundry room got painted.  Behr Moth Gray.  Man oh man I recommend this color.  It is the perfect brown toned gray.  Everyone who comes in the house comments on the paint color

.

  • I picked the color for the bathrooms and the kitchen.  The bathrooms are going to be Behr Pacific Mist.  I did several test spots and love it.  It is soft, peaceful and almost spa like.
  • The top of the kitchen cabinets are going to be Behr Bakery Box.
  • The kitchen walls are going to be a mix of Pacific Mist and a Behr color called Tinsmith.  We are stuck with the color of the bottom kitchen cabinets.  I will be visiting Lowes today to check out other paint colors.

Here is the color on the big wall:
     
Please ignore the cabinets and floor.  The cabinets are going to look so much better white and the floor will be reclaimed weathered oak vinyl tile.


  • In our exploring last week we found this stained glass door in a storage building. 

A little love and a lot of cleaning turned it into a beautiful piece to hang in our kitchen window.


  • We also found this cool old gate in our barn.    

A scrub down was all this needed to remove the dirt dobber nests and cobwebs.

It now hangs on what I call my “Cracker Barrel” wall.  This wall is where our dining table goes.   I also got a good start on the faux cow hide bench.   it still needs nail head trim and leather end caps but it is going to be fun hanging out behind the table against the wall.   I have decided to embrace the ranch theme.  We live in a ranch house on land where cattle have been raised with a hay farmer across the street, horses and chickens to the right and geese and hogs to the left of our property.  The  dining area wall has a chicken painted by a friend, two license plates- both off of farms. was The 1975 plate came from my husband’s family farm while the other plate came off a friend’s land.  It is a 1932 Texas plate that was used as a shingle on a barn.

  
I love the mudroom wall.  More on that this week. Mr. Math is my hero.

Mr. Math starts back to work Monday so work will slow a bit.  The floor and wall are priorities.  I will be calling an electrician in to make the lighting make sense and fix some questionable wiring.


Lumi loves this place!  
 
The shutters are going to be part of the wall soon.

We are tired, sore, and feel incredibly blessed to have this opportunity.

I hope you are enjoying our journey.

Blessings, 

Karen

Behr Paint with Primer, Country Style, Lake Livingston, Painted Furniture, recycled furniture, Repurposed Furniture, rescuing damaged furniture

A Bench From Bits and Parts

Well operation trash to treasure went well this weekend. A year ago I bought four sets of headboards/ footboards for $12.00.  One of them ended up on my front porch.  One ended up as a gift for a friend.

making a bench frame

The one that ended up being mine is partially assembled here.  The others are in the background.

The last two have been hanging around the garage ever since. The double bed one was a mid century teak veneer headboard that had a broken leg and the twin set was mostly that not real wood, you know the stuff…sawdust and glue with contact paper on top covering it all, except the four bedposts which were cannon ball style solid wood spindles. It was the grossest piece of junk in the garage. Mold was even growing on the swollen wood like substance. Mr. Math has seriously asked to get rid of that particular set more than any other piece in the garage. I just kept thinking inspiration would strike.

IMG_0636

IMG_0637

IMG_0639

Finally, it came to me…marry the best of both sets to make one bench.

The bench is going on our lake house front porch . It is going to be a functional seat to put on or take off shoes. No bells, no whistles, no arms… Just painted wood with stained slats for seats.

I came up with the idea of using the bed posts in the moldy set upside down as the legs of the mid century set. The curvy legs add to the straight lines and cutting the footboard in half horizontally allowed more of them to show.

IMG_0638

IMG_0640

IMG_0641

IMG_0642

I decided to do slats for two reasons; I like the way the stained slats look and leaving little gaps between them will allow for rain and dirt to fall through.  Here they are all cut, sanded and ready for stain.  Minwax Jacobean stain is my go-to stain for a dark color.

IMG_0643

After staining this collection of mismatched boards from the scrap pile looks more uniform.

IMG_0644 IMG_0645

If you know me, then you know the steps to getting paint on a piece.  Sand the flat places, use liquid deglosser on the curves and gooves, prime it all with Zinser primer.

I feel like I say this a lot lately but seriously, the weather is just not my friend right now.  Here are photos of the 90% completed bench.  I SOOOO very much wanted it to be out on the porch when the realtor showed up, but alas, no luck with the weather allowing me to finish.

IMG_0654 IMG_0655 IMG_0656

Here are the photos of the bench all put together.  There are two boards that need painting and it needs a good coat of Poly before going on the porch.  This bench out of bits and parts will probably end up being one the most used benches we own.  I am going to make rolling crated to go under it for shoes.

I would love hearing from you.

Have a great day,

Karen

Blogging, mid-life, Painted Furniture, reclaimed wood, Repurposed Furniture, The Garagemahal

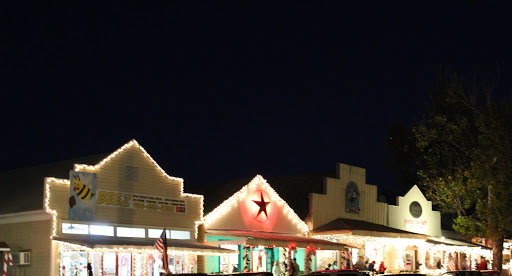
Welcome to Our Little Corner of the World

If you are new to The Weekend Country Girl, Welcome!  If you are one of my long-time friends, please indulge me as I introduce myself to the newcomers. My blog has literally doubled in readership over the last month.

My name is Karen and I am not a professional blogger or furniture repurposer.  This blog and my projects are my hobby.  I am a professional educator in a suburb of Houston.  I am a high school principal who loves her job, works crazy hours, and has a lot of stress in her daily life.  On the weekends, and any other chance I get, I head to the small town of Coldspring, where I wear sweat pants, go thrift store shopping, and work out in the Garagemahal.  I am a happy chick  when I am covered in paint or sawdust on the weekend.  Come visit if you ever in the area.  For real.

I am happily married to the love of my life, Mr. Math, who is a small town farm boy from Troy, Texas.  We have been married for 33 years and have two great kids.  I am lucky enough that both of my parents are still with us and active.

Both kids are married to wonderful spouses and live a long way from us.  We miss all four of them terribly.

family

We also have a rescue dog named Lumi.  She keeps me humble and reminds me that I am not in charge of the world.

lumi running

karen

If this photo looks like a school yearbook photo, that is because it is!  Does it take you back to high school?

Here we are in the first ever selfie I took of us.  It was on our Christmas cruise this year.

If you are new to my site it is probably because of my recent post about a corrugated tin wall on Remodleaholic, or the Facebook post on their site about our super simple buffet table for the deck, or because of my mudroom bench.  That bench has been my most popular post, ever.    Whatever the reason, I am thrilled to have you here.

Finished Mudroom Bench

IMG_0462

I started blogging as a way to show my friends and family what we were up to at our little cabin in the piney woods near Lake Livingston. We are both cheapskates frugalistas who would rather figure out how to do something ourselves than pay someone a crazy amount of money to do the work for us.  Buying a second home eight years ago was a stretch for us financially so we really had to figure out how to furnish a home on the cheap.  I never envisioned that my blog would be read by anyone who did not know me personally, in fact, I remember when I had my first post with 50 page views.  Man, I thought I was something else.

1-IMG_9864 1-IMG_9859

Along the way I have learned a few things about blogging (okay, not so much here), design, and how to re-imagine furniture but who I am has not changed.  This site is still just a hobby and way to show my friends what we are up to and to get input.  ( I really do want your input when I ask for opinions. )

drink station sailboat blue

Beverage station from sewing cabinet.

finished red headboard bench

Bench from headboard and footboard.

green sofa table

Buffet table from dining table legs and re-claimed wood.

I make mistakes, I am a terrible photographer who can’t take a good shot indoors to this day, I have a hot temper that gets me in trouble more than I like and I get my feelings hurt when people are mean.

I love a variety of styles, I like mixing painted wood with stain. I think every room should have one piece of furniture or accent that makes folks smile when they walk in the room.

Happy Camper green end table

mid century

western dresser

Funky Dresser

We are hoping and praying right now that we can sell our beloved Star Hill so that we can buy 15 acres in Coldspring with several buildings that will be our retirement home.   I hope you follow along on our journey into mid-life and beyond.

barn and pond

Thanks for finding this blog and welcome to our little corner of the world.

Blessings,

Karen

Blogging, Repurposed Furniture, resale finds, Thrifting, using bright colors, vintage style

My Most Popular Posts

Well hello there.  If you are new to the blog, welcome.

In the last week I have a lot of new friends who have chosen to follow my little bitty minnow of a blog  Thank you for choosing to follow along.

It is winter here in southeast Texas. That means high humidity, rain, and lots of days I am not able to do any furniture work. Add to that my full time job is at its busiest an that adds up to not much getting accomplished.  The garagemahal is loaded with projects just waiting for a warm sunny day to come along.

I thought you might enjoy some of the most popular posts that you might have missed in the past.  If you are one of my long-time followers, indulge me as I take a walk down memory lane.  🙂 If you click on the underlined writing  by each number it will take you directly to the post about the piece.

1. Mudroom Bench ( You probably found me through this piece but I am including it just in case you found me some other way.)

Finished Mudroom Bench

2. Beverage Station ( Old sewing cabinet and stainless sink make parties more fun.)

beverage station 1

3. Green End Table Makeover (Yes, Virginia, there is a Junk Fairy.  From time to time she drops things off at our house.)

Junk Fairy End Table

4. Buffet Table (My son’s favorite piece.)

buffet table

I hope that each and every one of you is inspired to look at furnishings differently and see the potential in even junk pieces.

(There may be a treasure hiding in there.)

Have a wonderful day.  I love hearing from you.

Blessings,

Karen

Curbside rescue, Dresser, Repurposed Furniture, Roadside Rescue

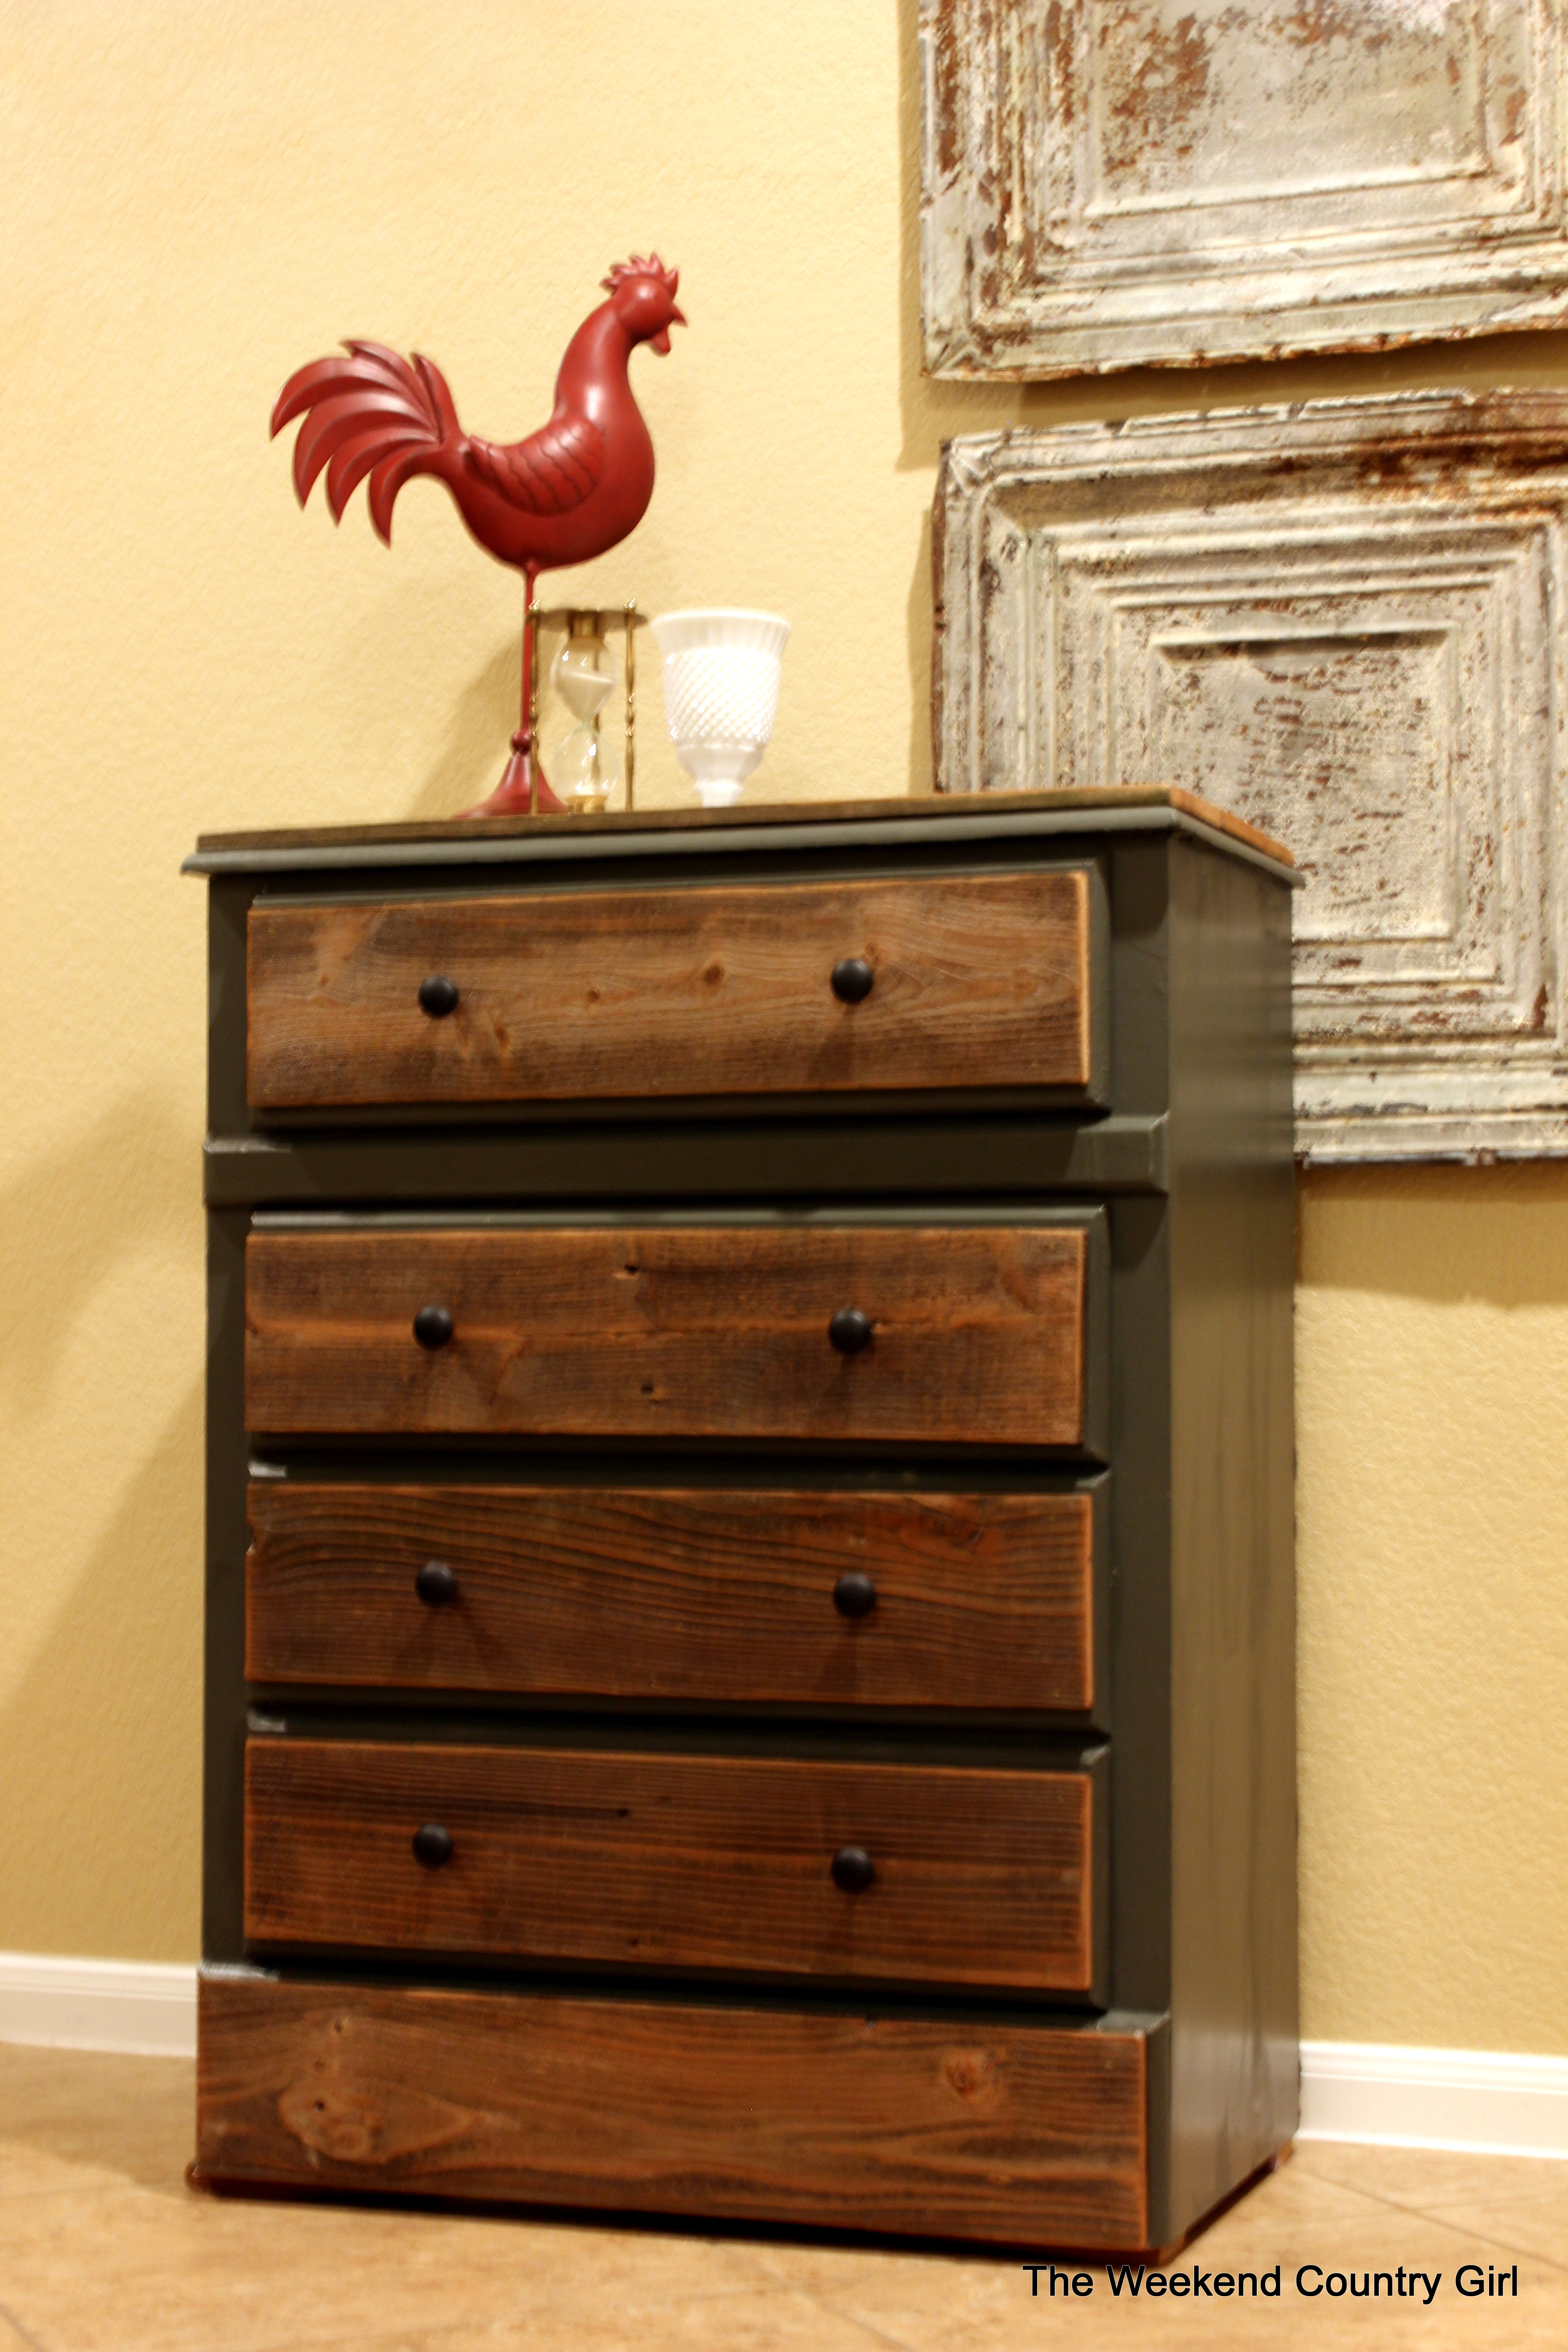
Roadside Repurposed Dresser

We found this beauty sitting on the side of the road outside a rental house.  There wasn’t much I loved about the piece except that it had some great French Provincial hardware hiding under layers of paint but I just couldn’t leave it sitting on the curb waiting for heavy trash pick up.

2015/01/img_2406.jpg

We stopped and got the dresser along with this piece I am still thinking about what to do with it but I am thinking gray and creamy white.
2015/01/img_2271.png

After a month of the ugly lavender dresser sitting in our garage I decided that this was the weekend to get busy and do something with the piece. Because the piece was not real wood and had some areas that the fake wood had gotten wet and was swollen, I knew it would need a lot of sealing.  First it all got primed with Zinzer primer then I made my own version of chalk paint for the second coat out of a grayish, greenish OOPS paint sitting in the garage that I thought would work for the piece. Here is a trick if you like the look and feel of latex paint with poly on top for durability but like the way that chalk paint will cover nasty surfaces, use one coat of chalk paint then sand lightly, then paint over it with the latex paint.

1-IMG_9985

After painting the whole piece I could see it still needed additional help.
I decided  to take the dresser in a whole different direction.

1-IMG_9987

1-IMG_9984

I took off the French Provincial hardware and added cedar fencing we picked up when our neighbors changed out their fence.  One board covered the front of each dresser drawer, one to cover the bottom part and three to cover the top.  Only one board needed to be cut down narrower on the table saw. After the boards were nailed on, I gave them a good sanding to bring out the color of the wood.

1-IMG_9986

The hardware I decided to use out of my hoard was some shiny brass hardware that had been given to me by a neighbor. A coat of Rustoelum Flat spray paint designed for metal was just the ticket to getting the look I wanted. My math-minded husband figured out where the pulls needed to go on the dresser and drilled the holes so that they would line up vertically.

2015/01/img_2407.png

2015/01/img_2408.png

Here he is in all his glory. No one would guess that this dresser was a cheap, feminine, not wood dresser headed for a landfill.

1-IMG_0002 1-IMG_0003 1-IMG_0006 1-IMG_0008 1-IMG_9999

It is going to be a gift for a hard-working friend.

What do you think about the finished $2.00 project?

I would love to hear from you.

Blessings,

Karen

Country Style, Painted Furniture, Repurposed Furniture, resale finds, Style, The Garagemahal, the suburban home, Thrifty decorating, vintage style

The Finished Funky Dresser

Painting furniture in the Garagemahal during a southeast Texas winter is tough. It is either too cold or too humid to dream of painting. I usually take on smallish projects that I can finis in the house during winter. This fall I found a dresser that I wanted to turn into an unusual entertainment center. It was $20.00 at Huntsville Goodwill. It is a 1950’s wooden dresser that probably went in a boy’s room.

IMG_1885.JPG

I had been looking for something to turn into a funky dresser after finding this dresser a year ago at the Mainstreet America Christmas home tour.  It was over a thousand dollars but it was so cool.

IMG_1859.JPG

The dresser was originally destined for my brother in law and sister in law’s  new house near us. It took me so long to surprise them with the piece done that they already bought a beautiful entertainment center out of whiskey barrel oak.

I wasn’t sure what I would do with it at this point, until I sanded the top corner. There it was: “I love e b”. My hubby’s first and middle name begins with e and b. ( In his family he goes by Eddie Ben.)  I knew it would have to be something that would end up with us.

1-IMG_9452

I struggled with what to do with each drawer and redid three of the drawers at least twice, one of them three times.

I determined that I did not want to spend much on this project. I have a large collection of hardware, a pile of paint and everything needed to give the wood a weathered finish like the inspiration piece. A bonus is that the colors on the piece will be colors I already like and have in my home.

IMG_1862.JPG

IMG_1864.JPG

What you see above is just a small sample of the hardware I have. Notice how many of the pieces I photographed I actually used in the final shot.

Saturday afternoon the skies cleared, the humidity dropped and I had about two hours to work.

The dresser went from looking like this Saturday …

1-IMG_9024 1-IMG_9023 1-IMG_9022

To this by mid-day, Sunday.

1-IMG_9473

1-IMG_9461

I glazed the turquoise because it was a little too bright for the rest of the piece after this photo and I added  a license plate and some letters.  I am not sure it is finished but it is coming along.

Soon, I will tell you where I hope it gets to go.

Here are a few close up shots I took after adding the license plate from 1969 that we found in the dirt at my husband’s family farm.  The numbers are the year of his birth and the S  is our last name initial.

1-IMG_9478 1-IMG_9476

Did you notice I used a different license plate than what I pulled originally?  I decided that I wanted to use the one with browns and yellows.  It is great that I have options.  I collected quite a few plates from my husband’s farm.

1-IMG_9479

I love it.  I am proud that I did this almost all by myself.  I cut trim, drilled holes, selected colors, and rethought it when I wasn’t happy.  I did have a meltdown on the white bottom corner “drawer” (it is actually one long drawer made to look like two) and had to get help on that one.  I could not get the trim to line up.  Thanks, Hubby.

All in all I have less than $10.00 in supplies in the dresser along with the $20.00 investment for the dresser I think it turned out well.

Funky Dresser dresser with different drawer colors painted mulitcolored dresser

I have a random bunch of french provincial hardware that I would love to do a little girl’s dresser with one day.  The possibilities are exciting.

Thanks for reading my blog.

I would love to hear what you think about my funky dresser.

Blessings,

Karen

Chair, Decorating, DIY, Painted Furniture, Repurposed Furniture, the guest room

Painted Fabric Wingback Chair

Unless you are a junker, like me, you might not appreciate the presents I get from my friends. Recently I got a load of treasures from a friend that included this fleshy colored velvet wingback chair.

The chair was solid, there were no tears in the fabric and it wasn’t even too worn.  I knew it would work for a project I had in the back of my mind for a while.  I saw this amazing pink couch a while back.  The company ( Faux Real Design Company) rents the couch out for showers, photo shoots, etc.  I could not believe it when I learned the couch had been painted.

IMG_1835.JPG

I have been thinking about painting furniture ever since I saw this over the top couch.  I would never in a million years want it in my house full time but what a fun piece for a photo shoot or a shower.  Ashley at Faux Real did not use the same paint I did, and her couch is frankly much softer, but after a lot of searching online I did discover you can paint fabric with latex paint and something called fabric medium.

I knew when I saw this beauty that teal would be the only thing that would make me happy.

upholsterypaintafter.jpg

Teal Chair

I chose Behr Real Teal.  I bought the fabric medium at Hobby Lobby.  It is mixed one part medium to one part paint.  I bought three bottles using my 40% coupon  three times.

You mix the fabric medium to paint 1:1 and spray down the fabric  with water between each coat of pant.  I got a cheap water

I will admit that the chair looked terrible after one coat of paint.  I was a little terrified.

IMG_8465

The photo above is of the chair all sprayed down with water.

IMG_8466

The paint goes on very thin and looks very transparent on the first round. (I was more than a little worried at this point.)

IMG_8467


It dries more opaque, but as you can see above,  the first coat was splotchy.

It took three coats of paint to get the solid look I wanted.  I decided to go wild with the legs.  Lime green.  the guest room can handle the color because it makes sense there.

lime green legs

I also added at lime stencil to the back of the chair.

stenciled fabric chair

Here is the chair in the room.

teal painted fabric


I wouldn’t say that the finished fabric is soft, but it is no rougher than burlap of canvas.  I definitely does not feel like velvet any longer.

1-IMG_9038


See?  In this room a teal chair with lime legs doesn’t look crazy.  Right?

This is some art work in the room.

1-IMG_9040

Do you see the colors?

This year our fall dance theme was glow in the dark.  The kids designed the photo booth space and I knew exactly what it needed to add some fun…

IMG_8533

IMG_8580

IMG_4790


Yes, you can paint fabric.

Thank you for taking the time to read my post.

I hope you have a wonderful day.


Blessings,


Karen